Showing posts with label #craft. Show all posts

Friday, May 29, 2015

Interview with Amna from Crafty!

   Hello all! Finally I can relax after six days of exams! And sorry for the absence, maybe I should start making crafts again ... *sigh*
   And, did you know? I've got a new craft blogger friend, Amna from Crafty ! From her blog, you already know she's a talented girl. Now, finally I get the chance to interview her! Say hello to the audiences, Amna!
  So, let's get this started!


1. For you, what is a 'blog'?
    For me a blog is a place where you express your thoughts or spread your ideas around the world. It is a platform for everyone to spread their voice. If you become popular and successful once, you can make a living through blogging.
2. Who / what inspires you to blog?
   Jenni from I Spy DIY inspired me to blog. I loved her crafts and other stuff so I thought why shouldn't I start my very own?
3. When did you start blogging?
    I started blogging on 27 May 2014, and my only blog is Crafty (just preparing to celebrate its first anniversary 🎉) (Congratulations Amna!) 😁
4. What are your friends/families' opinion about your decision to start a blog?
   My family and friends didn't knew that I had started blogging. I told my parents while hesitating because I didn't took their permission to do so. They were actually so happy when they got to know this and they wished me luck. The always help and guide me whenever I need them. My friends on the other hand were extremely impressed. Some of my friends didn't believed me. Here in my country, people don't know much about blogging so some people were actually confused when I told them. But my parents are extremely proud of me, they tell everyone about me and they have never stopped me from doing anything public. In my country, females are stopped from exposing or participating much in public, but I thank Allah that my family isn't such one.
5. Have you ever experiencing 'blogger's block' ? How did you feel about it?
   Umm, yes. I felt hopeless. I actually thought that I should stop blogging, but my family encouraged me and gave me ideas.
6. You know your post is ready to post when it already has ... ?
    It depends on the situation actually, sometimes I do and sometimes I don't.
7. Do you have any habits when writing a post? Like, drink a tea, eat a chocolate, etc. ...
    No I don't. I just write a post when I take a view at my project photo-shoot and I say "Yeah, that is good enough".
8. For you, what's the best post you have ever write & publish?
    For me the best post I have written is every post I have ever written :D but the viewers mostly liked my post "DIY Laptop Decoration/Stickers", although, it had the worst pictures I have ever taken. It has about 500+ views as of today.
9. Any blogging tips?
    Do recheck you material for any mistakes. Promote your content by yourself, don't rely on others. Take good photos and work hard on your blog design. If possible, buy your own domain and don't advertise to much content on your blog as it looks extremely messy. Promote you blog on social media and set up a Facebook page as it is one of the largest platforms for promotion. Interact with other bloggers as much possible.
10. Any messages for the new craft bloggers out there?
     Always believe that what you write is perfect. People will appreciate it but those who don't are just jealous that you are way more better than them :) And if you photography is good, submit your posts to craftgawker as you'll get a lot of views when you get featured over there.
***
   Have you ever visit Amna's blog? What are your favorite posts? Mine are Kawaii Wall Art, Foam Stamps, and No Sew Foamic Sheet Pouch, and basically almost all of her posts! Although I've seen some other version of her tutorials in the internet, her tutorials has unique taste and her photos have beautiful angles and views! And did you know? She's a Buzzfeed contributor! And there are many things that will surprise you in her 'About' page. I think I should learn things to her ...

Sunday, March 15, 2015

DIY Watermelon Pom-Poms by Miranda + #1 Guest Post!

   Hello everybody!
   So ... guess what? Heck yeah! Finally, this blog has its first guest post! It's from Miranda - you know that awesome The Reindeer Files blog? Yes, it's hers!
   Because she's awesome, why don't you just take a seat and enjoy her post?

-------------------------------------------------------------------------------------------------------------------------------------------------------------------
   
   Hi, I’m Miranda and I blog over at The Reindeer Files, Hana has kindly allowed me to guest post on her blog so I thought I’d share a little DIY with you all.


   You will need:

   ~ wool (red, green and black)
   ~ a pom-pom maker or a substitute 
   ~ scissors 

   I used a pom-pom maker for this tutorial but you can use anything of a similar shape. 

   First take the red wool and wrap is around the pom-pom maker


Then take the black wool and wrap it around twice in one or two places.


   Repeat steps 1&2 unit your ball of wool is quite round. Take the green wool and wrap it around the maker bellow the red until it is equally as thick.


   Put another piece of wool through the gap at the base of the pom-pom maker and tie it loosely at the top. Carefully slip the wool off the pom-pom maker and tie the wool more tightly.


Cut all the looped threads.


Then trim the pom-pom to your desired shape. I like making balls but you could shape it like a wedge. You can choose to keep the long piece of wool in order to attach the pom-pom to something later.


   Finished!

   I think I’m going to make a long watermelon pom-pom garland.

   If you enjoyed this post, feel free to check out my blog. Thank’s so much to Hana for having me, you can check out her post on my blog too!

-------------------------------------------------------------------------------------------------------------------------------------------------------------------

   So, yeah, that's it! Creative, right?

   And, if you are wondering what's happening on me - well, the National Exam is just some months away, and there are many tests at my school. I got bad grades for math, and, yeah, I think I should study harder. Keeping a blog active is a bit hard for me right now, so, maybe I will post 1 or 2 guest posts a month ... 

   If you want to write a guest post here, feel free to contact me!

By the way, have you try this tutorial?

P.S: You can send me a guest post about tips & DIYs!

Saturday, February 14, 2015

START: A Starter Kit Jar


   Giving gifts is a confusing business, right? For instance, one of your friend is going to have a birthday soon, but you don't know what his / her favorite gifts! Sometimes not giving the right gifts can become a serious problem, you know - maybe they will think that you mock them, or whatsoever.
But, I can help you - I have an idea!
   How about you give them a jar full of things they'll need when they have their unique dream jobs? Like, if he / she wants to be a designer, fill the jar with drawing stuff, like pencils with different grades, coloring pencils, pens, coloring pens, rulers, etc. Or you can fill the jar with items they need for regular occasion, like travel-size bathroom things! It's okay as long as the jar can hold all of them.
   So, let's get started!

Here's what you should know about the one who will be the receiver of the jar:
  1. You should know their unique hobbies / dream jobs / projects they want to make & things their dream job / projects required.
  2. You should know when are their birthdays.
For the jar:
  1. Choose big jars so you can fill it with many things.
  2. Use plastic jars- just in case the receiver accidentally drop it.

   Ready? Let's make it!

1. Fill, Decorate!
    I fill my jar with mini stationeries - for writing on-the-go. And I decorated it with washi tapes - simple! For more jar-decorating ideas, take a look on my past post.


3. Give it.
    You can give it to your neighbor, your friend, your relative, your coworker, basically you can give it to anyone who interested with stuff in it / anyone who need the things inside!

   
***

   And that's all for this 'START' post! Do you have any unique gift-packaging ideas?


Friday, January 23, 2015

Inspirations & Others #1

   I have a compilation of inspirations for you today! To be honest, I post them in one post either because their tutorials are too short to have their own posts, or because I want to share it to you - but already made it without taking photos for tutorial, and don't have some of the materials to make another.

1.


Washi Tape Paper Clip
   All you need are a paperclip and a washi tape. Stick the tape on the paper clip, and ta-da!
   If you are curious what's my paperclip hold, they are free printables from Kesi'art! Check 'em here.
   *Website in French

2.

   DIY Notebook Cover
   You just need a note book, a glue, some washi tapes, some cute illustrations (I got them from National Geographic for Kids' Fun Stuff Pages), some markers, scissors and some cardstock papers.

3.

   DIY Calendar
   Cardstock papers, some markers, scissors, washi tapes, and a ruler - it's that simple.

3.

   DIY Washi Tapes Holder
   Not exactly a DIY, actually. It's an abandoned CD holder :D

   Okay, that's all I have now. Do you have any DIY inspirations or ideas? If yes, feel free to tell about them here!


Saturday, January 10, 2015

START: Your Own Private Library + FREEBIES

 
   The idea of a library is actually fun, y'all. Like, we can rent a book for FREE for a week. And we can choose which book we want to read. Okay, let's just forget those old, grumpy librarian, but without them, the library's a total mess! So thank them for taking care of those books you borrowed!
   I got an idea of my own library from Knock Knock Personal Library Kit. And from my book-lover friends. If you have the materials (and you are diligent enough), you can make it in one day! Here's what you need to make (or have):

1. 

A freakin' note book
    This is a wedding invitation, actually. But I use it as a library note book.


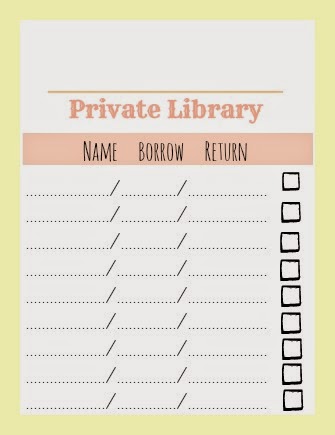
   You need to write the name of the borrower, the book's title, and when it should be returned. You can add 'when the book borrowed' or somethin'.


*additional: a list of books that can be borrowed.

2. 

Some 'return' cards
   So the borrowers know when they should return your books. I made the card out of cake boxes and the holder from flyers.
    Put the card inside its holder, and stick them to the book using sellotapes or glue. 

3. 

~additional~: Some Library Cards
   There are different uses of a library card at different libraries. Maybe you can contributing a review of a book for the library, can borrow 2 books at the same time, or ... anything.
   To make your own (handmade) library card, use a cardboard box.


   Btw, this is one of my library cards

4. 

A pack of stamps + stamp pad
   Libraries (always) have stamps, so why not? You can make your own stamps or buy one. SO FANCY!

5. 

~additional again~: A pencil case + pencils /  pens
   So you don't have to freak out in the middle of library's 'rush hour' because your pencil magically disappear.

5. 

~additional again and again~: A librarian glasses
   Either so you can see clearly, or intimidate your borrowers so they return the books quickly - while looking very professional.

5. 

~very important~: Books
1. Make sure your book is in a good condition
2. Have more than 5 books so your borrowers still return to you to borrow a book again.

*Update: FREEBIES!


   To help you make your own private library, I give you some 'Return Cards' Printables! You can download them here and use them as:
1. an inspiration for your own 'Return Cards'
2. a real 'Return Cards.' 
    Print them on some kind of cardboard papers (buffalo papers, etc.), 
    or print them on ordinary A4 papers.

   This is my first experience on creating share-able freebies, so, if my printables are broken/un-download-able, please message me!


   Okay, that's all for now. See you in my next post, and happy crafting!


Sunday, July 6, 2014

DIY Hunt! Loomband Kit

   Yesterday I went to Galaxy Mall, a mall near my housing. There are two craft shops there-one is a scrapbook store and the other is a fancy stationery shop. They sell rare things from overseas, and of course, they are pretty expensive.
   After circled the shop, I found this rare DIY kit (in Indonesia), a loomband kit!

   
   The kit is made by Popcorn Fancy, inc. in Korea (maybe. I cannot found their website). There are 3 kinds of kit in the shop; a starter kit, with fewer loomband. A medium kit, which I bought. And a pro kit, which have many kinds of loomband colors. The starter kit is $2 ($1=Rp 11.000), the medium kit is $3, and the pro kit is $5. The pro kit is way too expensive, and they don't have any instruction manual, but the starter kit is too boring, so I bought the medium kit.

   After struggling to make my first loomband bangle, this is the result.


   Well, it is a bit plain. But I feel very happy!


   Okay, that's all for now. Next time I visit a craft store, I will review another thing for you! Enjoy!